Networks
Introduction
OpenStack allows to define virtual network topologies which are private to a project. These virtual networks can then be interconnected to public external networks. You are in full control of your private (also called self-service) networks, for which you can configure IP subnets, routers, filtering rules and create network ports for your VMs as you wish. However your VMs network interfaces can only be assigned private IP addresses from your private subnets. You cannot cannot create network ports on the TGCC cloud public networks or use public IPs on your VM network interfaces.
Instead, outgoing connexions from your VMs must go through a router which performs a network address translation (NAT) from the private IP assigned to your VM to a public external IP managed by TGCC.
For VMs hosting services that need to receive incoming connexions from external networks you can allocate public floating IPs from an IP pool managed by TGCC and map these public IPs to private IPs in your network. All of this can be achieved with a few clicks or through the command line.
The Network>Topology panel is a good starting point to better understand these concepts. When your project is created, a default network topology is setup as represented below to accommodate the most common use cases.
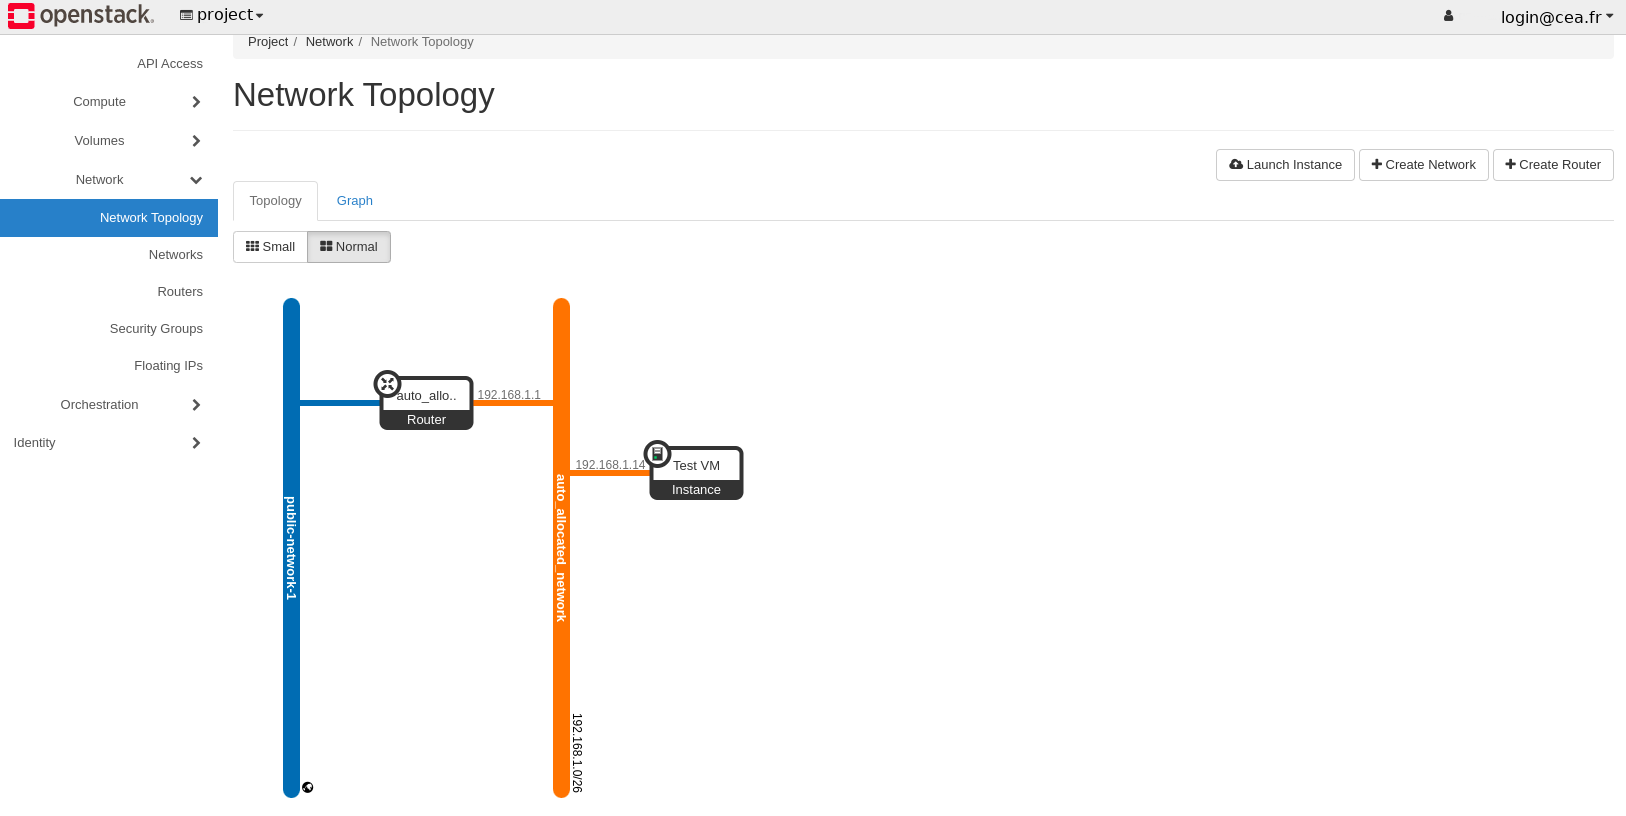
The network auto_allocated_network is a self-service network that is automatically created for each project. You can connect your VMs to this network (in the example above, a single instance is connected) and they will receive an IP from the IP subnet pre-assigned to it:
CIDR:
192.168.1.0/26Gateway:
192.168.1.1
The network public-network-1 is a public network managed by the TGCC cloud to which an public IP subnet is assigned. You cannot directly connect VMs to this network or use IPs from the public subnet on your VM network interfaces. However you may connect a router from your private networks to this public network to provide internet connectivity to your VMs thanks to NAT and/or floating IPs.
The router auto_allocated_router connects your private network to the public network as explained above.
Floating IPs
As explained in the introduction, floating IPs are IPs reachable from the Internet which allow to direct ingress network traffic to your OpenStack instances.
They are a limited resource and must be used accordingly. Only VMs hosting a service that is directly accessed from the Internet need to use a floating IP. For outgoing traffic, a single router can provide NAT for all your VMs without having to allocate floating IPs for each VM.
Using a floating IP requires two separate steps. A floating IP first needs to be allocated from the TGCC pool of floating IPs. Once the IP is allocated it is reserved for your project until you decide to deallocate it. Then, you can assign an allocated but unused floating IP to one of your instances network ports. This can be done from the Network>Floating IP or from the Compute>Instance panels. If you terminate an instance or unassign its floating IP, the IP remains allocated to your project until you manually deallocate it.
You can only allocate floating IPs up to your quota which is displayed in the dashboard overview.
Warning
TGCC does not provide a DNS service. You must use an external DNS service to associate a floating IP that you have allocated to a domain name that you own.
Security Groups
Security groups define which network connections are allowed from and to an instance.
A default security group is applied to any instance that has no other defined security group. Unless you change the default, this security group denies all incoming traffic and only allows all outgoing traffic from your instance.
Each security group is composed of a set of rules. Each rule defines a type of connection that is authorized based on its direction (incoming/outgoing), protocol, network address and port.
Multiple security groups can be applied to a single instance. Security groups are cumulative in that they can only extend authorizations, not restrict them. This make the network policy easier to audit as the result of applying multiple security groups does not depend on precedence rules between security groups. A connection that matches any of the security group rules is authorized, other connections are blocked.
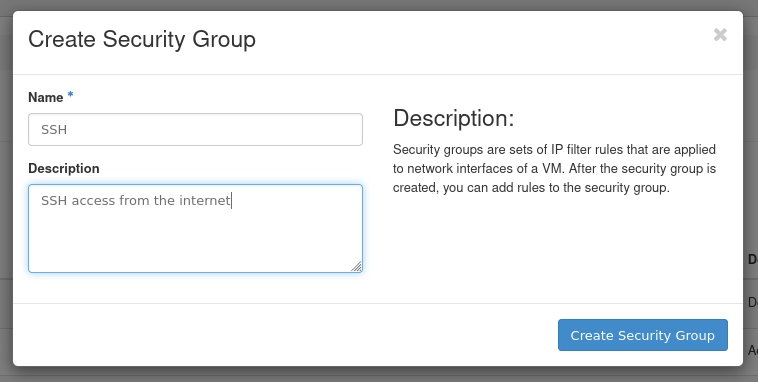
To create a security group go to Network>Security group and click on .
For example, create a security group for allowing inbound SSH connections from anywhere you may fill the form in the modal dialog as shown below:
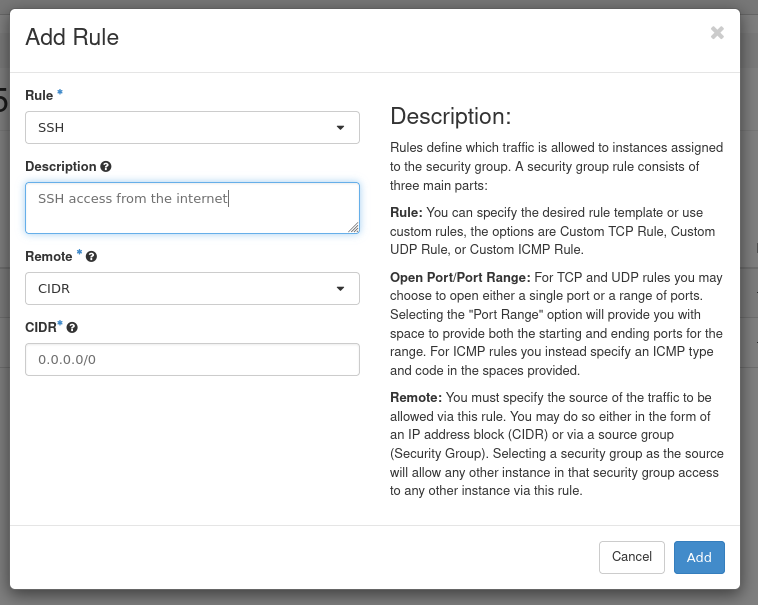
Then in the panel that opens showing rules for your new security group, click on
to add a rule and fill the form as shown below by
selecting the pre-configured SSH rule and leaving the CIDR as 0.0.0.0/0
to allow inbound connections from the Internet:
You can select the security groups associated to a VM in the instance launch forms on by going to Compute>Instance and selecting in the Actions dropdown of the instance you want to modify.
TGCC network policy
Warning
While you may choose to allow all kinds of inbound connections to your VMs using security groups, any external network traffic entering TGCC from the Internet is first submitted to the TGCC firewall. Due to security constraints applicable at TGCC this firewall only allows inbound connections to the following port ranges:
22
80
443
range [9000-10000] (upon request)